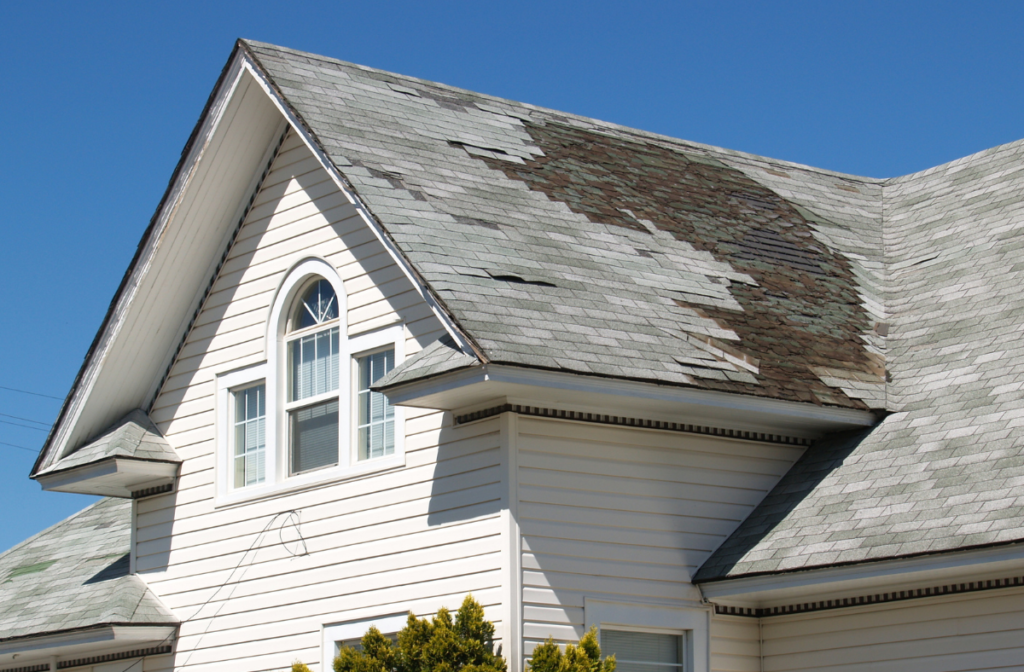
Want to Improve Your Homes Energy Efficiency? Tighten Up With Energy-Efficient Roofing Systems Insulation!
If you’re looking to stretch your hard-earned home improvement dollars a little farther, you can’t go wrong by investing in energy-efficient roofing systems. But, regardless of the age of your home, the right improvements can do wonders for cutting your energy costs.
But what are the “right” improvements?
We talked with some of our local roofing and siding contractors to get their advice on improving your home’s energy efficiency. And all our experts said the same thing: the best bang for your buck is tightening your home with high-quality insulation – particularly in the attic, where heat tends to accumulate during the warm months.
Why is the attic such an issue? When it’s hot outside, heat builds up in your attic (this stored heat is commonly called “radiant heat”) and eventually travels back down into your home. Radiant heat from the attic accounts for more than 90% of the heat gain in your living space. That extra heat forces your air conditioning system to work extra hard to keep things cool, meaning higher electric bills. Without proper protection, your home can’t keep hot air out and cool air in – a problem that can increase your energy costs by more than 30%.
When looking at those figures, it’s easy to see why roofing and siding contractors focus on insulation to improve energy-efficient roofing systems efficiency.
Choosing the Insulation: Know Your Options
So, now that you know why insulation is essential, it’s time to figure out which option will be the best fit for your home – and your budget. Today’s insulation comes in a variety of different technologies. To help you make an informed decision, we’ve compiled a list of three popular types of insulation on the residential market: fiberglass insulation, radiant barrier, and reflective insulation.
Fiberglass Insulation
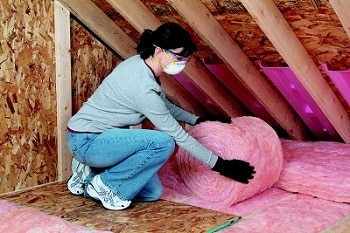
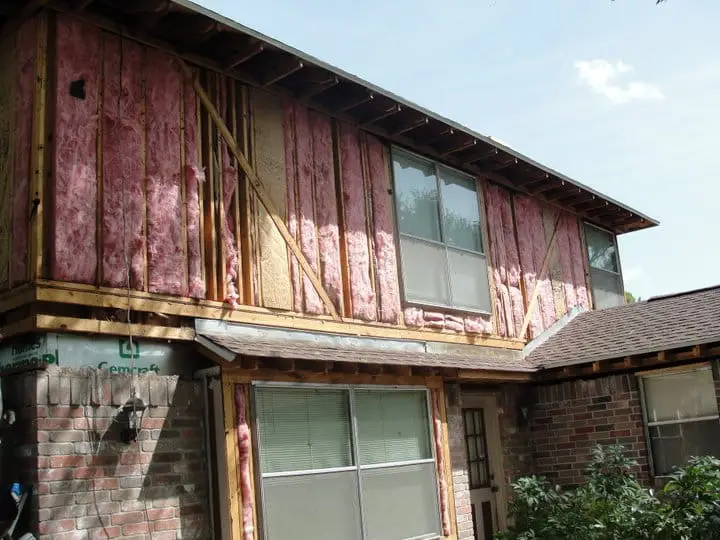
What it is: Found in more than 90% of homes in the U.S., fiberglass is by far the most popular form of insulation on the market today. Fiberglass is made of a blend of materials such as sand and recycled glass, and it is fibrous and heat-resistant. This versatile insulator inhibits the natural flow of warm air into cooler spaces, which is why it is widely used in areas such as attics. There’s a downside, though: Fiberglass absorbs heat to the point of over-saturation, then releases it back in the opposite direction – so some of your attic’s heat eventually leaks back into your living space.
Cost: The cost of installing fiberglass insulation can vary widely – anywhere from $0.50 to $2.25 a square foot – depending on factors like where you live and what brand of insulation you choose. One upside of choosing fiberglass: It’s a fairly easy DIY project. Many companies produce fiberglass in large rolls that lay out easily, so you can complete the project yourself for about $100 -$500.
Return on Investment: Because the price of fiberglass insulation varies so much, your return on investment will vary, too – but on average homeowners can recoup their costs in about 5 years through lowered energy bills.
Radiant Barrier
What it is: A radiant barrier is a thin layer of reflective film that blocks the heat absorbed by your roof. A radiant barrier is installed on the underside of your roof, where it reflects heat back out of your attic, preventing it from traveling down into your home’s living spaces. A radiant barrier can enhance the efficiency of your existing insulation and cut your air conditioning costs by 10-15%. An independent test at the University of Kansas found that HeatBloc Ultra – one popular brand of radiant barrier — improved the efficiency of traditional mass fiberglass insulation by 87% to 98%.
Cost: Radiant barriers can range widely, averaging $900 – $2000 depending on which brand you choose and the size of your roof. For a rough estimate, multiply the square footage of your home by 1.5, then multiply that by $0.55.
Return on Investment: Radiant barriers can be cost-effective in hot climates, in new construction, and in an already energy-efficient home, with some homeowners realizing a payback through energy savings in less than 10 years. That said, a radiant barrier might not be a wise investment if your home is already well-insulated, or if you live in a cool climate (the energy you save during warmer months may not be worth the cost of installation).
Reflective Insulation
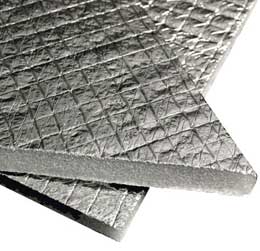
What it is: In a nutshell, reflective insulation is a traditional insulation (like fiberglass) covered by a low-emittance foil surface (like radiant barrier). Reflective insulation is installed between your attic’s roof rafters to reflect up to 97% of radiant heat away from your home. And it has a cool backstory, too: The technology was originally developed by NASA as a barrier for spacecraft and spacesuits. The idea was to develop a material that would reflect the heat away from astronauts by day and retain internal warmth at night.
Cost: Cost: Reflective insulation – such as LOW-E Reflective Insulation – is fairly easy to install. It’s compact yet strong enough to resist punctures, and it easily shapes around angles and corners. At a cost of around $.40 per square foot, going the do-it-yourself route can make this a pretty cost-effective option for homeowners on a budget. But it may not be a project for inexperienced DIY-ers: Because the efficacy of reflective insulation depends on accurate installation, you may want to consider hiring a professional installer.
Return on Investment: Although the performance of reflective insulation can vary depending on factors such as the size of your home and the amount and quality of your existing insulation, this space-age improvement seems to be a wise investment. Field tests by the Florida Solar Energy Center have shown that reflective insulation can reduce your cooling bill by 2% to 17%, with a payback period of 6-7 years.
Which Insulation is Right for You?
Your insulation choice will depend mostly on the style and size of your home; your geographical location and climate; the quality of your existing insulation; and, of course, your budget. If your house is relatively new and well-insulated, reflective insulation might give you just the right energy-efficient boost. But if you’re on a budget and need to start from scratch, traditional fiberglass might be the best way to start.
Wallet-Friendly DIY Improvements with Big Energy Payoffs
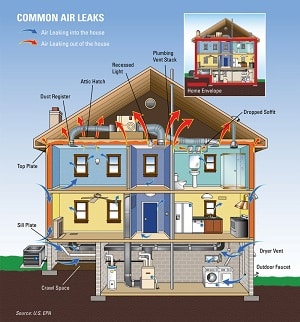
Regardless of the insulation you choose, your home’s “envelope” (or entire outer shell) needs to be tight in order to make sure your home is truly energy-efficient. After all, what good is a well-insulated attic if you can’t contain your costly conditioned air?
Dale Phillips is the owner of Tomball, TX-based DPIS Engineering, which inspects hundreds of homes each day and performs energy analysis to help homes run more efficiently. He says that although insulation is crucial to efficiency, it’s not the only improvement homeowners should make.
“There is no single ‘magic bullet’ in energy efficiency,” he says. “That’s why I always start with improving the ‘building envelope.’”
Rick Brill, a representative for HeatBloc Ultra, shares this sentiment. “For energy efficiency, we look at the whole house: air leakage, efficient windows, proper insulation, duct leakage, ventilation in the attic, etc. If you look at the home as a functioning unit, you will start to see how all these little things add up to big savings throughout the life of the home.”
What’s more, these “little things” are budget-conscious ways to step up your home’s energy efficiency. Small, inexpensive projects – such as caulking around drafty windows or installing specialty gaskets around electrical outlets – can tighten up your home envelope. And unlike installing new insulation, these DIY improvements won’t cost hundreds of dollars to complete:
Plug Leaks
There’s little sense in running your air conditioning if your home is full of places for all that cool air to escape. Fortunately, air leakage problem areas are easy (and cheap!) to address with a simple tube of caulk or a spray can of expanding foam from your local hardware store. Use them to easily seal these common culprits:
- Windows that leak air and doors that don’t close tightly.
- Extra space around TV or cable wires entering and exiting your home.
- Gaps around the plumbing fixtures and pipes in your kitchen, bath, and other rooms that need water access.
- Drafts around bathroom vents, recessed lights, or fixtures.
- Air leaks from pipes and wiring that go through the basement ceiling through the floor above.
- The upper perimeter of your basement, where the cement or block walls meet the wood frame of your house.
Seal Drafts
Specialty tape and weather-stripping make it easy to keep cool air in (and keep hot air out). Want some quick DIY energy savings? Take a tour of your home, and seal off these drafty problem areas:
- Gaps under inside doors. Doors leading from the house to the garage or foyer are often not as well sealed as doors that open directly to the outside. Another option? Install a door sweep to prevent hot air from coming in and conditioned air from getting out.
- Leaky ducts. Use foil tape (rather than “duct tape” that doesn’t last) to insulate all ducts you can access in your unfinished spaces like the basement and attic. For extra energy efficiency: Straighten any flexible ducts to eliminate kinks that constrict airflow.
- Air registers. Use special HVAC tape to seal around the rims of the duct boxes where they meet the floor, wall, or ceiling, and look for disconnected duct-work. Another tip: To enable air circulation, keep furnishings and decorations clear of air registers at all times.
Invest in Gaskets and Covers
Your local hardware store is full of cheap and easy solutions to common air leak issues. While caulk and weather-stripping are always useful in a pinch, consider investing in products designed to address some of these specific energy-guzzlers: [list style=”arrow1″ color=”cyan”]
- Outlets: Seal holes or air leaks around electrical outlets with specially designed (yet inexpensive at as little as 10 cents apiece!) outlet gaskets.
- Window A/C units: If you can’t remove your window-mounted air conditioners in the colder months, prevent drafts with tailor-made covers at $15 a pop.
- Recessed lighting: You need to keep a 3-inch gap between lighting fixtures and insulation for fire prevention, but this ceiling opening causes energy loss. Cap these gaps with specially formed attic recessed light covers – for less than $20 – to prevent air leaks but still allow the space necessary for safety.
- Spaces around your attic hatch: An attic door cover can prevent hot air from getting through your attic door and down into your home’s living spaces. These covers come in a wide range of styles, and an even wider range of prices ($40-$200).
Bottom line? Don’t buy into the misconception that a limited budget means limited energy-efficiency options. The truth is, small changes can greatly enhance the insulation you already have. And even if you have to space out your larger home improvements over time, you’ll save energy – and money! – in the long run.
Research Before You Buy
Whether you hire a contractor to boost your home’s energy efficiency or choose to go the DIY route, it’s important to do your research first. Lee Mooney, director of sales for LOW-E Reflective Insulation got into the insulation business after extensively investigating energy-saving insulation options for his own home – and he urges homeowners to take their time and shop around before making any big decisions about any home improvement project.
Mooney recommends that homeowners compare prices – and he also says that you should always try to learn as much as you can about any product you plan to bring into your home. Once you’ve found an insulation product you like at a price that fits your budget, you should do additional research, Mooney says. Look at warranties and guarantees – and pay attention to where the product was manufactured.
“There are a lot of products made in third-world countries that do not have the same rules and regulations as the United States, thereby the safety of the family may come into question,” he says.
For extra peace of mind, look for products with “stamps of approval” from recognized agencies. A good place to start your research is the Federal government’s ENERGY STAR program. Now celebrating its 20the Environmental Protection Agency’s voluntary program helps you save money by encouraging energy efficiency technologies and practices in two ways:

By endorsing high-efficiency products that use less energy: ENERGY STAR-labeled products typically use 20%–30% less energy than required by federal standards. By providing tax incentives for qualifying products: Specifications differ with each item, and the EPA determines the price points and qualifiers each year. For 2013, certain types of insulation can earn you 10% of your cost, up to $500.
Of course, homeowners should still do their homework, even when considering a product that has earned internationally recognized approval. Mooney points out that each U.S. state has its own energy code requirements – and some states have no requirements or simply have “recommended” energy practices.
An Energy-Efficient Home on any Budget
Energy Efficient Roofing Systems Resources
Learn how to improve your energy efficient roofing systems efficiency! Check out these sites for helpful tools, links, and energy-saving tips: [list style=”arrow1″ color=”cyan”]
- GreenandSave.com’s offers a helpful return on investment (ROI) chart to estimate your energy savings when upgrading with eco-friendly home improvements.
- The American Institute for Architects provides many insightful green resources for clients https://www.aia.org/practicing/groups/kc/AIAS077432?dvid=4294965183&recspec=AIAS077432
- The Environmental Protection Agency offers suggestions on saving energy at home
- Download the U.S. Department of Energy’s Energy Savers https://www.doe.gov/sites/prod/files/energy_savers.pdf for tips on saving money by conserving energy at home.
- Check out an interactive model https://www.resnet.us/hers-index-large-scale of the Home Energy Rating System (HERS) to calculate your home’s energy performance.
- The U.S. Green Building Council (USBGA) offers a whole series of articles on energy efficiency.
- The International Code Council partners with DELMAR Cengage Learning to offer resources for green building. By improving your home’s insulation and fixing drafty problem areas, you can create a more energy-saving space that drastically cuts your heating and cooling costs. Whether you’re planning a full insulation upgrade or a pay-as-you-go DIY project, you can take steps to make your home more efficient.
